
Follow Me On Social Media!
Molten Chocolate Cakes Recipe: A Restaurant-Style Dessert You Can Make at Home.
Molten chocolate cakes have a reputation that can feel a little intimidating. They show up on restaurant menus with elegant plating and dramatic descriptions, often making home cooks assume they’re complicated or risky. In reality, this dessert is surprisingly approachable. Once you understand the timing and the balance of ingredients, molten chocolate cakes become one of the most reliable ways to serve something that feels special without turning your kitchen upside down.
I started making these cakes years ago as a quiet alternative to layer cakes and frosted desserts. They’re portioned, quick to bake, and don’t require decorating skills. The appeal is simple: a delicate outer cake that holds together just long enough to reveal a warm, flowing center when you cut into it. That contrast is what makes this dessert memorable.
This molten chocolate cakes recipe focuses on clarity and control. It’s rich without being overwhelming, sweet without masking the chocolate, and designed to work even if you don’t bake often. Whether you’re making dessert for guests or just want something warm and chocolate-forward on a quiet evening, this recipe fits the moment.
Ingredients
This recipe makes four individual molten chocolate cakes. Using good-quality chocolate matters here, since it carries most of the flavor.
For the Cakes
- 6 ounces dark chocolate (60–70% cocoa), finely chopped
- ½ cup unsalted butter
- 2 large eggs
- 2 large egg yolks
- ⅓ cup granulated sugar
- 1 teaspoon vanilla extract
- ¼ teaspoon fine sea salt
- ¼ cup all-purpose flour
For Preparing the Ramekins
- 1 tablespoon unsalted butter, softened
- 1–2 tablespoons cocoa powder or flour
Optional for Serving
- Lightly sweetened whipped cream
- Vanilla ice cream
- Fresh berries
- Powdered sugar, for dusting
Instructions
Prepare the Ramekins
Start by generously buttering four 6-ounce ramekins, making sure to coat the bottoms and sides evenly. Dust each ramekin with cocoa powder or flour, tapping out the excess. This step helps the cakes release cleanly after baking.
Place the prepared ramekins on a baking sheet and set aside.
Melt the Chocolate and Butter
In a heatproof bowl, combine the chopped dark chocolate and butter. Melt them together using a double boiler or in short intervals in the microwave, stirring frequently to ensure a smooth mixture.
Once melted, stir until fully combined and glossy. Set aside for a few minutes to cool slightly. The mixture should be warm but not hot—you don’t want to scramble the eggs in the next step.
Mix the Batter
In a separate bowl, whisk together the eggs, egg yolks, granulated sugar, vanilla extract, and salt. Whisk until the mixture thickens slightly and looks pale, about 1–2 minutes. This helps create structure in the finished cakes.
Slowly pour the melted chocolate mixture into the egg mixture, whisking constantly to keep everything smooth. Once combined, gently fold in the flour just until incorporated. Avoid overmixing; the batter should look silky and loose.
Fill and Chill (Optional but Helpful)
Divide the batter evenly among the prepared ramekins. At this point, you can bake them right away or refrigerate for up to 24 hours. Chilling the batter can make timing a little more forgiving, especially if you’re new to molten cakes.
If chilling, bring the ramekins back to room temperature for about 20 minutes before baking.
Bake the Cakes
Preheat the oven to 425°F (220°C).
Bake the cakes on the center rack for 10–12 minutes. The edges should be set and slightly puffed, while the centers remain soft. The tops may look just barely firm, with a slight jiggle when gently shaken.
Timing is crucial. Ten minutes will yield a very loose center, while twelve minutes produces a thicker, spoonable core. Every oven runs a little differently, so it’s worth noting the timing that works best for you.
Rest and Unmold
Remove the cakes from the oven and let them rest for 1 minute. Run a thin knife around the edges of each ramekin, then carefully invert onto serving plates. Lift the ramekins slowly to release the cakes.
Serve immediately while warm.
Flavor & Texture Notes
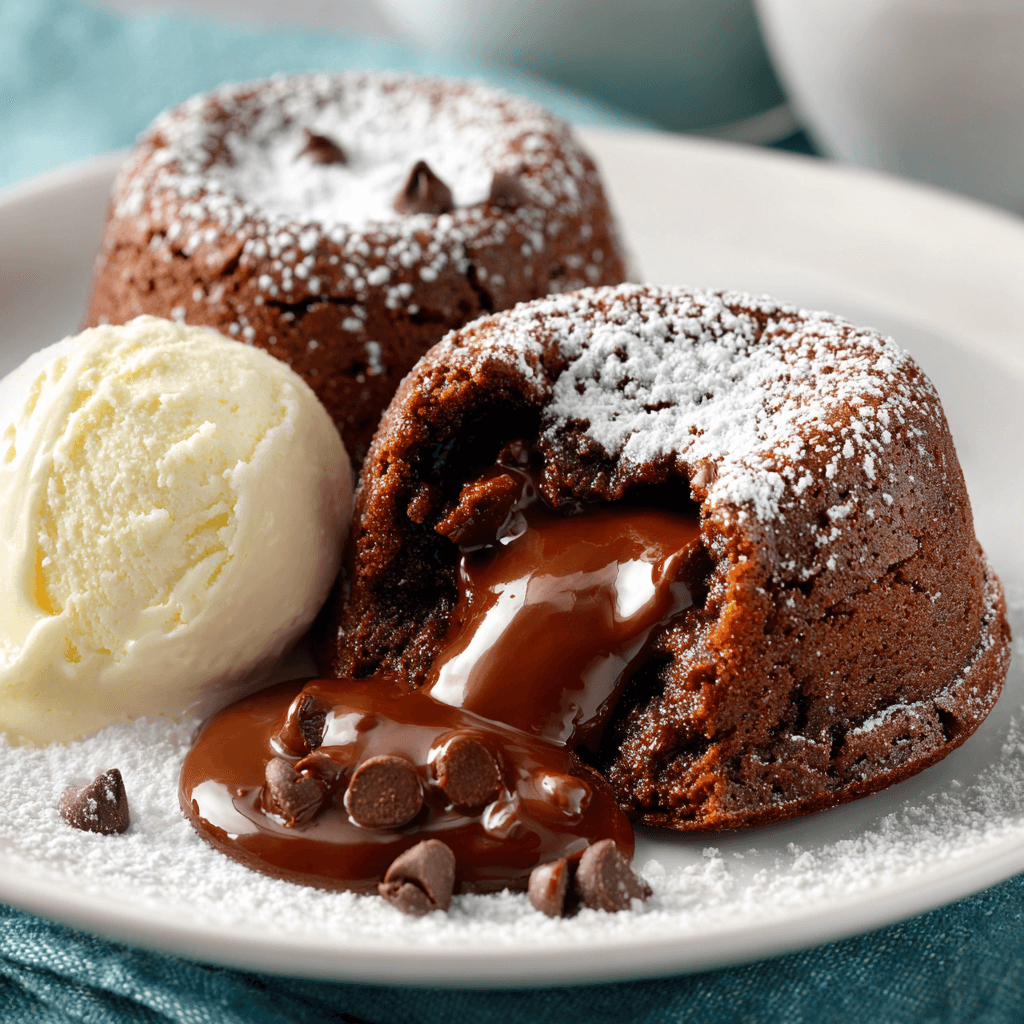
Molten chocolate cakes are all about contrast. The outer layer is tender and lightly structured, similar to a soft brownie or sponge. It holds together just enough to support the center without feeling dry or crumbly.
The interior is warm, smooth, and deeply chocolatey. Using dark chocolate keeps the sweetness balanced and allows the cocoa flavor to come through clearly. The texture of the center depends on bake time—it can range from sauce-like to custardy, but it should always flow when cut.
Because the cakes are served warm, the flavor feels fuller and more rounded than chilled chocolate desserts. Each bite changes slightly as the cake cools on the plate, which is part of the experience.
Tips & Variations
If you’re unsure about timing, bake one test cake first. It’s the best way to learn how your oven behaves and how molten you prefer the center.
For a more intense chocolate flavor, use chocolate closer to 70% cocoa. For a softer, sweeter profile, choose something closer to 60%.
You can add a pinch of espresso powder to the batter to deepen the chocolate flavor without making the cakes taste like coffee.
To create a flavored center, press a square of chocolate, a spoonful of hazelnut spread, or a piece of salted caramel into the middle of each ramekin before baking.
If you prefer baking without individual molds, silicone muffin cups also work well and make unmolding easier.
Storage & Make-Ahead
Molten chocolate cake batter can be prepared up to one day ahead and stored covered in the refrigerator. This makes it an excellent option for dinner parties, since all you need to do is bake just before serving.
Once baked, the cakes are best eaten immediately. The molten center will continue to cook as the cakes cool, so reheating is not recommended if you want the signature flow.
Leftover baked cakes can be stored in the refrigerator for up to one day, but the center will firm up. They’ll taste more like a dense chocolate cake when reheated.
Serving Suggestions
Serve molten chocolate cakes simply and let them speak for themselves. A small scoop of vanilla ice cream or a spoonful of whipped cream adds contrast in temperature and texture without distracting from the chocolate.
Fresh berries bring acidity and freshness, especially raspberries or strawberries. A light dusting of powdered sugar adds visual appeal without extra sweetness.
For a more composed plate, drizzle a little crème anglaise or berry sauce around the cake rather than on top, keeping the center visible.
FAQ
How do I know when molten chocolate cakes are done?
The edges should look set and slightly pulled away from the ramekin, while the center remains soft. A gentle shake should show a slight wobble in the middle.
Can I make these without ramekins?
Yes. Oven-safe mugs or small bowls work as long as they’re similar in size. Adjust the baking time slightly if the containers are thicker or thinner.
Why did my cakes collapse?
A slight collapse is normal and often expected. If they collapse completely, they were likely underbaked or unmolded too quickly.
Can I make this recipe gluten-free?
Yes. Replace the all-purpose flour with an equal amount of gluten-free flour blend. The texture will be slightly softer but still works well.
Are molten chocolate cakes safe to eat?
Yes. The eggs cook enough during baking to be safe for most people, but if you have concerns, use pasteurized eggs.
Conclusion
This molten chocolate cakes recipe proves that impressive desserts don’t need to be complicated or time-consuming. With a short ingredient list and a clear process, you can create something that feels thoughtful and celebratory with very little effort.
Once you make them a few times, the timing becomes second nature, and the recipe turns into a reliable go-to for nights when you want dessert to feel intentional. Warm, simple, and centered around good chocolate, these cakes deliver exactly what they promise—no extra steps required.