
Follow Me On Social Media!
The Ultimate Soft and Chewy Christmas Sugar Cookies.
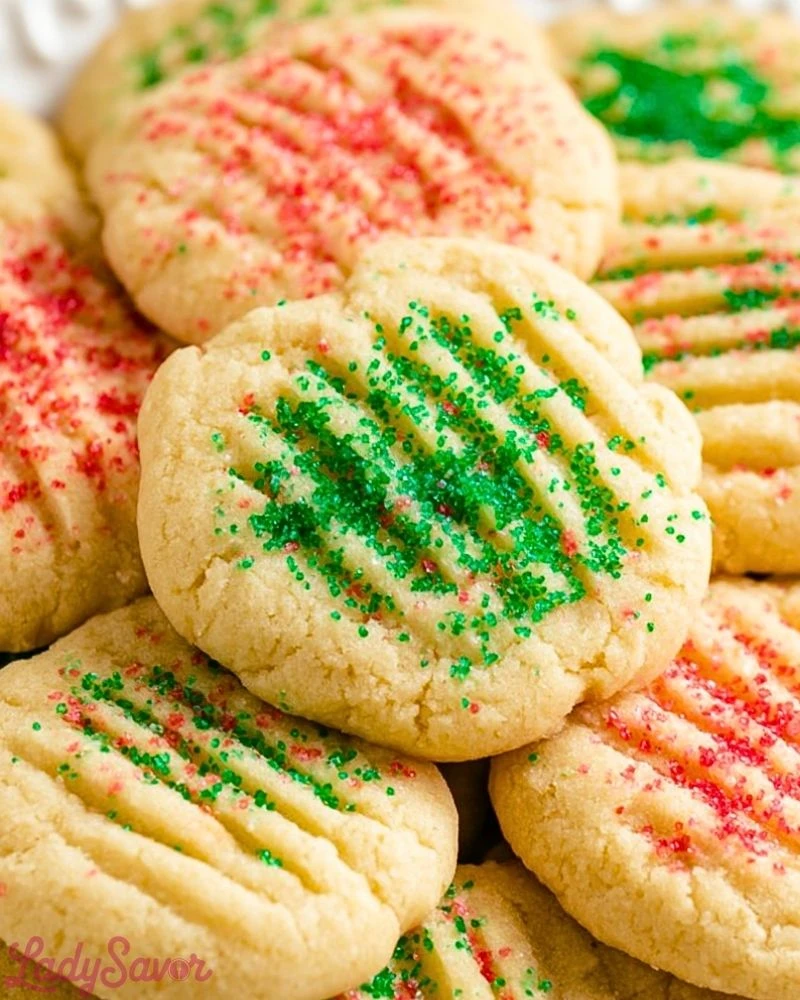
When the holiday season arrives, there is one recipe that serves as the foundation for almost every cookie exchange, office party, and family baking session: the classic Christmas sugar cookie. While some people prefer the thin, snappy ginger snaps or the richness of shortbread, the quintessential holiday cookie is thick, soft, and just sturdy enough to hold a generous layer of icing.
This recipe is the result of years of trial and error to find the perfect balance. We want a cookie that doesn’t spread into a puddle in the oven, but also doesn’t taste like dry flour. By using a specific ratio of butter to sugar and a touch of almond extract, we create a cookie that tastes like a professional bakery made it, but with the warmth and heart of a home kitchen.
Ingredients for the Perfect Holiday Dough
To get that iconic “soft-bite” texture, the temperature of your ingredients is the most important factor. Using cold eggs or melted butter will change the structure of the dough, so plan for a bit of room-temperature prep.
- Unsalted Butter: 1 cup (225g), softened to room temperature but not oily.
- Granulated Sugar: 1 cup (200g).
- Egg: 1 large, at room temperature.
- Vanilla Extract: 2 teaspoons of high-quality pure vanilla.
- Almond Extract: 1/2 teaspoon. This is the “secret” ingredient that gives cookies that classic bakery aroma.
- All-Purpose Flour: 3 cups (375g). Be sure to spoon and level your measuring cups.
- Baking Powder: 1 teaspoon. This provides just enough lift to keep them soft.
- Salt: 1/2 teaspoon fine sea salt.
Step-by-Step Instructions
Creaming and Flavoring
In a large bowl, or using a stand mixer fitted with the paddle attachment, beat the softened butter and granulated sugar together. You want to mix them on medium-high speed for about 2 to 3 minutes. The goal is a pale, creamy consistency that looks like whipped frosting.
Add the egg, vanilla extract, and almond extract. Mix until fully combined, scraping down the sides of the bowl with a spatula to ensure no streaks of butter remain at the bottom.
Integrating the Dry Ingredients
In a separate medium bowl, whisk together the flour, baking powder, and salt. Turn your mixer to its lowest setting and gradually add the dry ingredients to the wet. Mix only until the flour streaks disappear. If you overmix at this stage, the gluten will develop too much and you’ll end up with a tough, bread-like cookie.
The Essential Chill
Divide the dough into two discs and wrap them tightly in plastic wrap. Refrigerate for at least 1 to 2 hours. This is a non-negotiable step. Chilling the dough allows the butter to firm back up, which prevents the cookies from losing their shape (like a snowflake or a star) once they hit the heat of the oven.
Rolling and Cutting
Preheat your oven to 350°F (175°C) and line your baking sheets with parchment paper. On a lightly floured surface, roll one disc of dough out to about 1/4-inch thickness. If you roll them too thin, they will be crunchy; if you keep them at 1/4 inch, they will stay soft and pillowy.
Use your favorite holiday cutters to stamp out shapes. Re-roll the scraps as needed, but try to do so sparingly to keep the dough tender.
The Bake
Place the cookies on the prepared sheets, leaving about an inch of space between them. Bake for 8 to 10 minutes. The key is to remove them before the edges turn brown. They should look matte on top and just barely set. Let them cool on the baking sheet for 5 minutes before transferring them to a wire rack to cool completely.
Flavor and Texture Notes
These cookies are the definition of “melt-in-your-mouth.” The initial bite gives you a buttery richness, followed by the floral sweetness of the vanilla and almond. The texture is dense and fine-crumbed, making them the perfect canvas for frosting. Unlike store-bought cookies that can be overly crumbly, these have a slight “bend” to them, indicating they are perfectly moist.
Tips and Variations
- The Icing Choice: For a professional look that stacks easily, use a Royal Icing. For a softer, more traditional taste, a simple Buttercream frosting is best.
- Citrus Twist: Replace the almond extract with a tablespoon of fresh orange or lemon zest for a bright, zesty holiday cookie.
- Spice it Up: Add 1/2 teaspoon of ground cardamom or nutmeg to the flour for a sophisticated, warming flavor profile.
- Gluten-Free: This dough works exceptionally well with a 1:1 gluten-free flour blend that contains xanthan gum.
Storage and Make-Ahead
- Freezing the Dough: You can make the dough discs up to 3 months in advance. Thaw them in the refrigerator overnight before rolling.
- Baked Cookies: Once cooled, un-iced cookies can be stored in an airtight container for up to 5 days at room temperature or frozen for 2 months.
- Iced Cookies: Once the icing has fully set (usually 12–24 hours for Royal Icing), stack them with parchment paper between layers in a cool, dry place.
Serving Suggestions
A platter of sugar cookies is the centerpiece of the holiday table, but you can get creative with how you present them.
- Cookie Decorating Station: Set out bowls of different colored icings, sprinkles, and edible glitters. It’s a classic way to engage guests of all ages.
- With Cocoa: These are sturdy enough to be dipped into a hot mug of strawberry hot chocolate or a traditional dark cocoa.
- Gift Tins: Layer the cookies with festive tissue paper in a tin for a thoughtful, handmade gift.
FAQ
Why did my cookies spread and lose their shape?
This usually happens if the dough wasn’t chilled long enough or if the butter was too soft/melted when you started. If your kitchen is very warm, put the cut-out shapes on the baking sheet and pop the whole tray into the fridge for 10 minutes before sliding them into the oven.
Can I use salted butter?
Yes, just omit the extra 1/2 teaspoon of salt called for in the recipe.
How do I get the icing to look so smooth?
For Royal Icing, you need to find the “15-second consistency.” This means if you run a knife through the icing, the line should disappear and the surface should become flat again in exactly 15 seconds.
Conclusion
Baking Christmas sugar cookies is about more than just the end result; it’s about the process of slowing down and creating something by hand. This recipe provides a reliable, delicious base that lets you focus on the fun of decorating and sharing. When you pull that first tray of golden-white stars or trees out of the oven, it officially feels like the holidays have begun.