Follow Me On Social Media!
The Ultimate Guide to Perfect Chocolate Covered Strawberries.
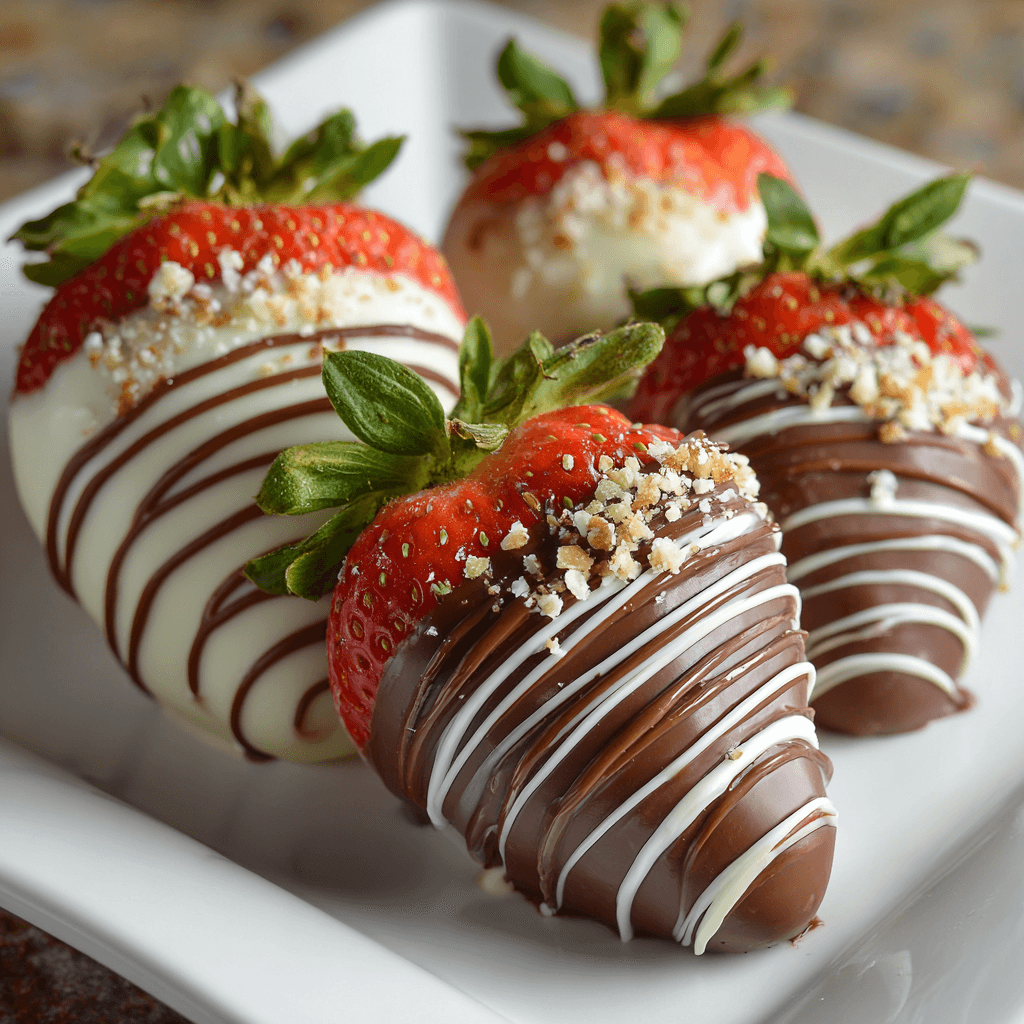
There is a reason chocolate covered strawberries remain the undisputed icon of elegant desserts. They represent the perfect culinary marriage: the bright, acidic snap of a fresh berry dipped into the deep, velvety richness of melted chocolate. While they appear sophisticated and expensive in gourmet shop windows, they are surprisingly simple to master at home.
The secret to a professional-grade strawberry isn’t found in a complex technique, but rather in the preparation. Most home cooks struggle with chocolate that seizes or won’t stick, but by following a few specific rules regarding moisture and temperature, you can create a batch that looks like it came from a high-end chocolatier. Whether you are prepping for a holiday, an anniversary, or just a weekend treat, this guide ensures your berries have that satisfying “crack” when you bite into them.
Ingredients
Success starts with the quality of your produce and your cocoa. Since there are only two primary ingredients, there is nowhere for mediocre flavors to hide.
- Fresh Strawberries: 450g (1 lb). Look for berries that are bright red all the way to the stem, firm to the touch, and still have healthy, green leaves.
- High-Quality Chocolate: 280g (10 oz). You can use semi-sweet, dark, or milk chocolate. For the best results, use a high-quality baking bar or “couverture” chocolate rather than standard chocolate chips, which contain stabilizers that prevent a smooth melt.
- White Chocolate: 50g (2 oz) for drizzling.
- Coconut Oil or Cocoa Butter: 1 teaspoon (optional). This helps thin the chocolate for a smoother dip and gives it a professional sheen.
Instructions
The Critical Drying Phase
Wash your strawberries under cold water and pat them dry individually with a paper towel. This is the most important step in the entire process. Chocolate and water are enemies. If even a single drop of water remains on the berry, the chocolate will “seize”—turning into a grainy, clumpy mess—or simply slide right off the fruit. Once patted dry, let the berries sit at room temperature for at least 30 minutes to ensure every bit of moisture has evaporated from the skin.
Preparing the Dipping Station
Line a large baking sheet with parchment paper or a silicone baking mat. Clear a space in your refrigerator so you can move the tray in quickly once the dipping is finished.
Melting the Chocolate
You have two reliable methods for melting your chocolate:
- Double Boiler Method: Place a heat-proof bowl over a pot of simmering water. Ensure the bottom of the bowl does not touch the water. Stir the chocolate constantly as it melts. This provides the most control and prevents scorching.
- Microwave Method: Place chopped chocolate in a microwave-safe bowl. Heat in 20-second intervals, stirring thoroughly between each burst. Stop heating when there are still a few small lumps left; the residual heat will melt them as you stir.
Once melted, stir in the coconut oil if you are using it. This will make the chocolate slightly more fluid and easier to work with.
The Dipping Process
Hold a strawberry by the green leafy stem. If the leaves are short, you can gently pull them back and hold the top of the berry. Dip the strawberry into the melted chocolate, swirling it slightly to ensure even coverage up to the “shoulders” of the fruit. Lift the berry out and let the excess chocolate drip back into the bowl. Give it a gentle shake or a little tap against the edge of the bowl. Place the dipped berry onto the prepared parchment paper.
Adding the Drizzle
Once the dark chocolate has set slightly (about 5–10 minutes), melt your white chocolate. Transfer it to a small parchment paper cone or a plastic sandwich bag with a tiny corner snipped off. Moving your hand back and forth quickly, drizzle thin lines of white chocolate across the berries.
Setting the Chocolate
Place the tray in the refrigerator for 15 to 30 minutes. This “shocks” the chocolate into setting quickly, which helps maintain a glossy finish and prevents the chocolate from blooming—developing white streaks.
Flavor and Texture Notes
A perfect chocolate covered strawberry should offer a contrast in both temperature and texture. The chocolate shell should be firm and cool, providing a distinct “snap” upon the first bite. As the shell breaks, you hit the juicy, tender interior of the berry. The flavor profile is a play between the earthy, slightly bitter notes of the cocoa and the floral, honey-like sweetness of the fruit. Using dark chocolate with at least 60% cocoa creates a more adult, sophisticated flavor, while milk chocolate provides a nostalgic experience.
Tips and Variations
Toppings
While the white chocolate drizzle is a classic, you can get creative by rolling the berries in toppings immediately after dipping while the chocolate is still wet:
- Crushed toasted hazelnuts or pistachios.
- Desiccated coconut.
- Crushed graham crackers for a “cheesecake” vibe.
- A light dusting of flaky sea salt.
“Tuxedo” Berries
For a formal look, dip the berry entirely in white chocolate and let it set. Then, dip the two sides at an angle into dark chocolate to create a “V” shape that looks like a dinner jacket. Add two or three tiny dots of dark chocolate down the center for buttons.
Boozy Berries
For an adult-only version, you can “infuse” the berries. Use a clean syringe to inject a tiny amount of Grand Marnier or Champagne into the center of the berry before dipping.
Storage and Make-Ahead
Strawberries are highly perishable, and once dipped, they have a limited shelf life.
- Best Eaten Same Day: Ideally, these should be consumed within 12 hours.
- Refrigeration: Store them in a single layer in a container lined with paper towels to absorb any condensation.
- Do Not Freeze: Never freeze these. As the berries thaw, the cell walls break down, turning the fruit into a mushy mess inside the hard shell.
- Condensation: If you see small beads of water on the chocolate after taking them out of the fridge, let them sit at room temperature for a few minutes and it will usually evaporate.
Serving Suggestions
These berries are a centerpiece on their own, but you can elevate the presentation:
- Dessert Board: Arrange them on a platter with clusters of grapes, hard cheeses like aged gouda, and some salted almonds.
- Champagne Garnish: Place a single strawberry on the rim of a flute or drop a small one directly into a glass of sparkling wine.
- Gift Boxes: Place individual berries in paper cupcake liners before putting them in a gift box to keep the shells pristine.
FAQ
Why did my chocolate turn white?
This is called “bloom.” It happens when chocolate is heated too quickly or stored in fluctuating temperatures. It is perfectly safe to eat and doesn’t affect the flavor.
Can I use frozen strawberries?
No. Frozen strawberries release too much moisture as they thaw, which will cause the chocolate to seize and the berry to become extremely soft.
What is the best chocolate to use?
Look for “couverture” chocolate. It has a higher percentage of cocoa butter, which makes it easier to dip and results in a shinier finish.
How do I prevent the chocolate from pooling at the bottom?
After dipping, hold the berry over the bowl for a few extra seconds. When you place it on the parchment, move it slightly about an inch after a few seconds to “break” the pool.
Conclusion
Making your own chocolate covered strawberries is a rewarding experience that yields much better results than the pre-packaged versions found in stores. Once you master the “dry berry” rule, you can whip up a batch of these in less than an hour, creating a dessert that is as beautiful as it is delicious. There is something truly special about the simplicity of this treat—it’s proof that you don’t need a complicated recipe to create something that feels entirely high-end. Go ahead and give it a try; you’ll be surprised at how professional your homemade batch turns out.