Follow Me On Social Media!
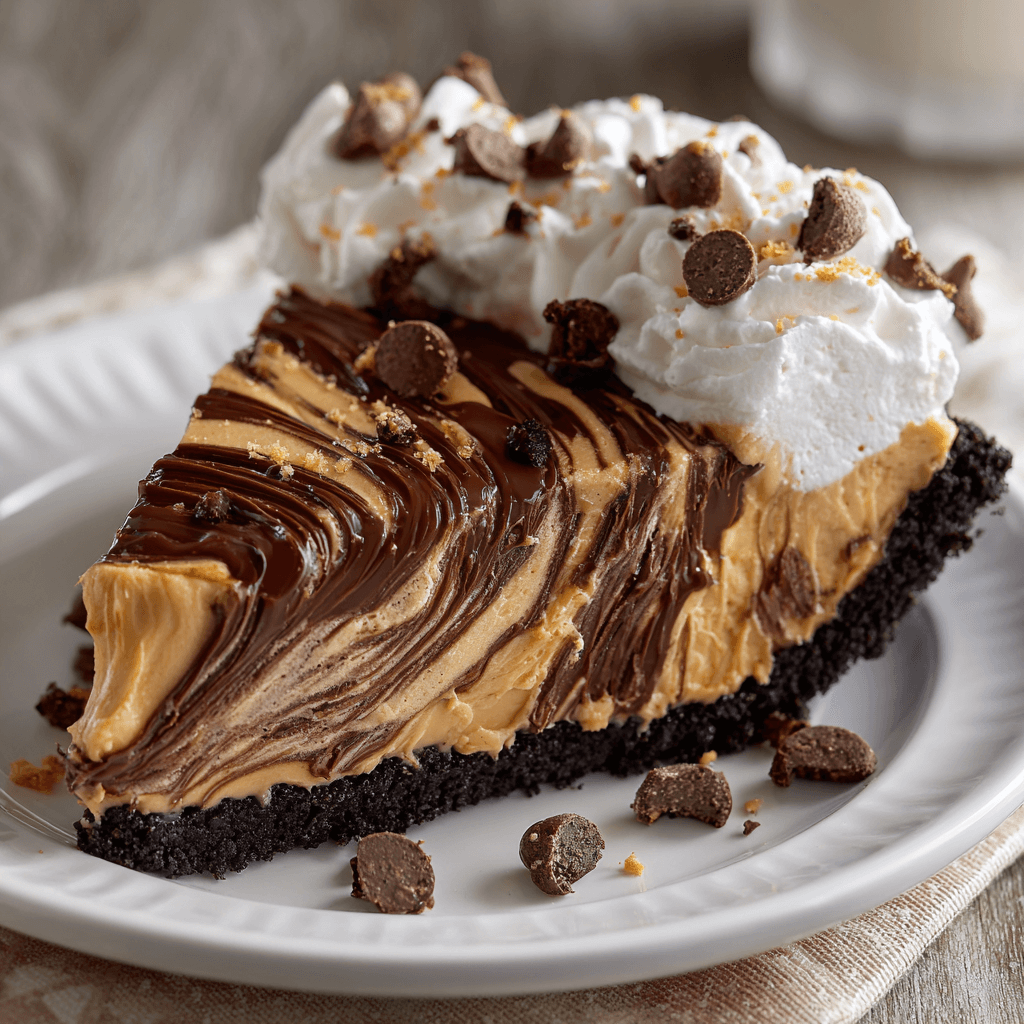
The Ultimate No-Bake Chocolate Peanut Butter Swirl Pie.
There is a timeless nostalgia in the combination of dark cocoa and salty peanut butter. It is a flavor profile that manages to be both humble and sophisticated, reminding us of childhood treats while offering the decadence of a fine ganache. While many peanut butter pies can be overly dense or heavy, this no-bake version focuses on a light, mousse-like texture that makes it far more approachable as a finale to a large meal.
The beauty of this recipe lies in the “swirl.” Instead of a single uniform filling, we create two distinct layers—one a deep, silky chocolate and the other a fluffy, salted peanut butter cream—and gently marble them together. This ensures that every bite offers a different ratio of the two flavors. Because it requires no oven time and relies on simple pantry staples, it is an ideal dessert for warm weather or for those days when your kitchen is already busy with other projects.
Ingredients
To ensure the filling sets properly without gelatin, use full-fat ingredients and avoid “natural” peanut butters that separate at room temperature.
The Crust
- Chocolate Sandwich Cookies (like Oreos): 300g (about 25–28 cookies).
- Unsalted Butter: 70g (5 tablespoons), melted.
The Peanut Butter Filling
- Cream Cheese: 225g (8 oz), softened to room temperature.
- Creamy Peanut Butter: 250g (1 cup). Use a standard commercial brand for the smoothest texture.
- Powdered Sugar: 120g (1 cup), sifted.
- Heavy Whipping Cream: 180ml (3/4 cup), chilled.
- Vanilla Extract: 1 teaspoon.
The Chocolate Filling
- Semi-Sweet Chocolate Chips: 175g (1 cup).
- Heavy Whipping Cream: 120ml (1/2 cup).
Instructions
Step 1: Crafting the Cookie Crust
Place the chocolate cookies (filling and all) into a food processor and pulse until they become fine crumbs. Pour in the melted butter and pulse again until the mixture resembles wet sand. Press the crumbs firmly into the bottom and up the sides of a 23cm (9-inch) pie dish. Use a flat-bottomed measuring cup to ensure the crust is packed tightly. Place the dish in the freezer to set while you prepare the fillings.
Step 2: Preparing the Chocolate Ganache
Place the chocolate chips in a small heat-proof bowl. Heat 120ml of heavy cream in the microwave or on the stovetop until it just begins to simmer. Pour the hot cream over the chocolate and let it sit for 2 minutes. Stir gently starting from the center until you have a glossy, smooth ganache. Set this aside to cool to room temperature; it needs to be pourable but not hot.
Step 3: Whipping the Peanut Butter Cream
In a large bowl, beat the softened cream cheese and peanut butter together until smooth. Add the powdered sugar and vanilla, mixing until fully incorporated. In a separate chilled bowl, whip the remaining 180ml of heavy cream to stiff peaks. Gently fold the whipped cream into the peanut butter mixture using a spatula. This lightens the density of the peanut butter, giving it a cloud-like consistency.
Step 4: Creating the Swirl
Retrieve the chilled crust. Spread about two-thirds of the peanut butter filling into the bottom of the crust. Pour half of the chocolate ganache over the top. Add the remaining peanut butter filling in large dollops, then drizzle the remaining chocolate over those dollops.
Using a butter knife or a skewer, gently swirl the two fillings together in a figure-eight motion. Do not over-mix, or you will lose the distinct marbled look.
Step 5: The Setting Phase
Cover the pie loosely with plastic wrap and refrigerate for at least 6 hours, or ideally overnight. This time is essential for the fats in the chocolate and cream cheese to solidify, allowing you to cut clean, stable slices.
Flavor and Texture Notes
This pie is a study in contrasting textures. The crust is dark, crunchy, and slightly bitter, which balances the intense sweetness of the interior. The peanut butter layer is airy and salty, while the chocolate swirls provide a fudgy, dense counterpoint. Because the filling is whipped, it feels much lighter on the palate than a traditional cheesecake, melting away quickly and leaving a lingering taste of roasted peanuts and cocoa.
Tips and Variations
The “Natural” Peanut Butter Issue
If you only have natural peanut butter (the kind with oil on top), make sure it is stirred exceptionally well. You may need to add an extra 2 tablespoons of powdered sugar to help the filling stabilize, as natural versions tend to be more fluid.
Salted Caramel Addition
For a three-flavor profile, drizzle a bit of salted caramel sauce over the chocolate layers before swirling. This adds a buttery, burnt-sugar note that complements the salt in the peanut butter.
Extra Garnish
Just before serving, top the pie with chopped peanut butter cups, a handful of honey-roasted peanuts, or a few extra chocolate shavings to give it a professional, bakery-style appearance.
Storage and Make-Ahead
- Refrigeration: This pie keeps beautifully in the refrigerator for up to 4 days. In fact, the flavor often improves after the first 24 hours.
- Freezing: This is an excellent dessert to freeze. Wrap the fully set pie tightly in plastic wrap and foil; it will keep for up to 2 months. You can serve it directly from the freezer for a “frozen silk pie” texture, or let it thaw in the fridge for an hour for a softer bite.
Serving Suggestions
- Hot Coffee: The bitterness of a strong black coffee or an americano is the perfect partner for the richness of this pie.
- Whipped Cream: A small dollop of unsweetened whipped cream on the side helps cut through the density of the peanut butter.
- Sea Salt: If you find the pie very sweet, a tiny pinch of flaky sea salt on each slice just before serving can elevate the entire dish.
FAQ
Can I use a pre-made graham cracker crust?
Absolutely. While the chocolate cookie crust is traditional, a graham cracker or even a pretzel crust works wonderfully with these flavors.
Why is my pie too soft?
This usually happens if the heavy cream wasn’t whipped to stiff enough peaks or if the pie hasn’t chilled long enough. If you are in a rush, you can place the pie in the freezer for 1 hour to speed up the setting process.
Can I use milk chocolate instead of semi-sweet?
You can, but keep in mind that milk chocolate is much sweeter and has less cocoa solids. The pie will be significantly sweeter and may have a slightly softer set.
Do I have to use cream cheese?
The cream cheese provides the structural “backbone” of the pie. Without it, the filling would be too liquid to slice. If you dislike the tang of cream cheese, ensure you use the full cup of peanut butter to help with the stability.
Conclusion
This no-bake chocolate peanut butter swirl pie is the perfect example of how a few simple techniques can transform basic ingredients into a showstopping dessert. By taking the time to fold the cream gently and master the marble swirl, you create a treat that is as visually striking as it is delicious. It is a reliable, crowd-pleasing recipe that requires no professional equipment—just a bit of patience while it chills. Once you see the first clean slice come out of the pan, it is certain to become a staple in your dessert rotation.