
Follow Me On Social Media!
Indulgent Chocolate Waffles: A Decadent Breakfast Classic.
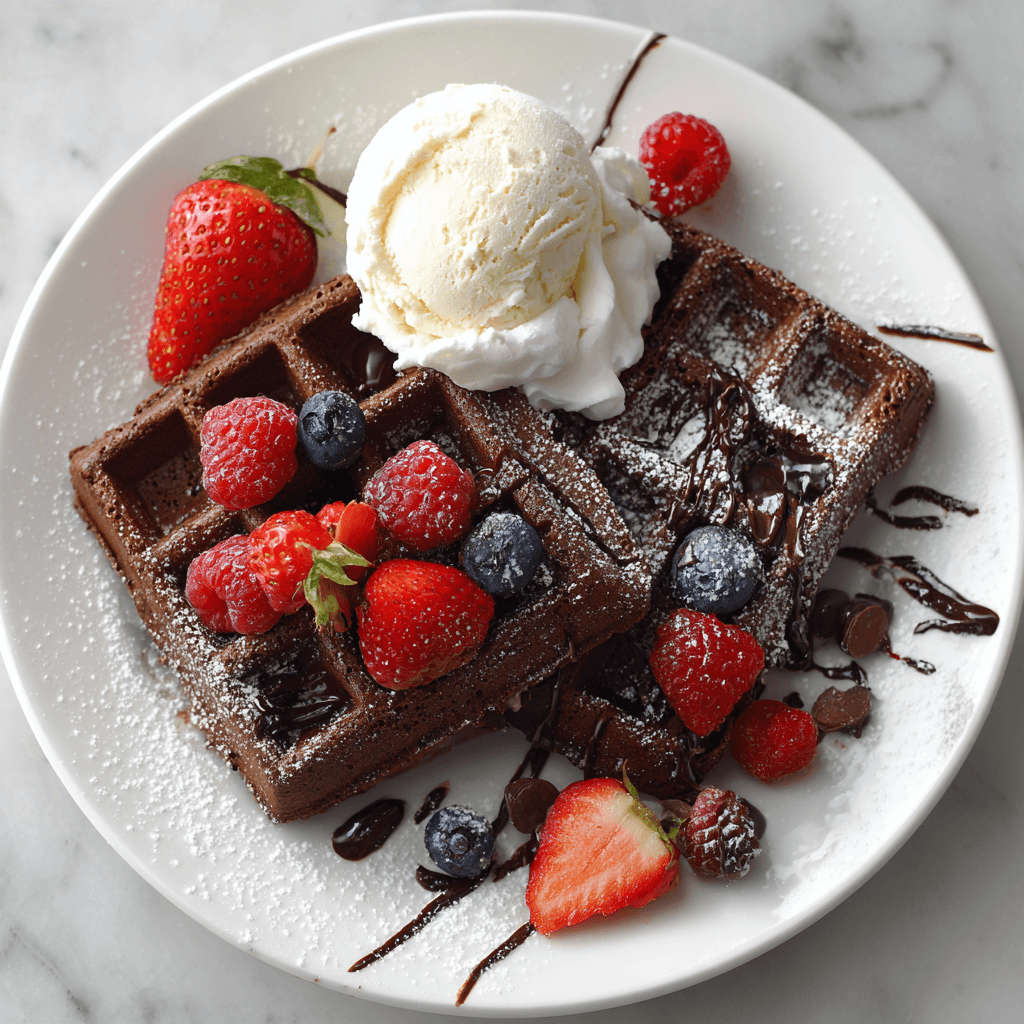
There is a specific kind of magic that happens when the iron clicks shut on a batch of Chocolate Waffles. While traditional waffles are a breakfast staple, the chocolate version elevates the experience into something truly celebratory. It is a dish defined by its dual nature: a crisp, dark-cocoa exterior that yields to a center as light and airy as a soufflé.
The beauty of this recipe lies in its “indulgent” profile. By using high-quality cocoa powder and folding in chocolate chips, you create a waffle that doesn’t just taste like chocolate but feels like a warm, melted confection. It is the ultimate weekend luxury—perfect for birthday breakfasts, holiday brunches, or a “breakfast-for-dinner” treat that feels sophisticated yet deeply nostalgic.
Ingredients
To achieve the perfect balance of a crunchy shell and a moist crumb, the fat content and the leavening agents must be precise. Using buttermilk provides a subtle tang that cuts through the richness of the cocoa.
- All-Purpose Flour: 1 ½ cups.
- Unsweetened Cocoa Powder: ½ cup (Dutch-processed for a darker, richer color).
- Light Brown Sugar: ½ cup (packed).
- Baking Powder: 1 tablespoon.
- Baking Soda: ½ teaspoon.
- Fine Sea Salt: ½ teaspoon.
- Buttermilk: 1 ½ cups (room temperature).
- Unsalted Butter: ½ cup (1 stick), melted and slightly cooled.
- Large Eggs: 2, room temperature.
- Vanilla Extract: 2 teaspoons.
- Mini Chocolate Chips: ½ cup (optional, for extra decadence).
Instructions
1. Sift the Dry Ingredients
In a large bowl, whisk together the flour, cocoa powder, brown sugar, baking powder, baking soda, and salt. Sifting the cocoa powder is highly recommended here, as it tends to clump and can leave bitter “pockets” in the finished waffle.
2. Emulsify the Wet Ingredients
In a separate medium bowl or large measuring pitcher, whisk the eggs until light. Stir in the buttermilk, melted butter, and vanilla extract. Ensure your buttermilk isn’t ice-cold, or it will cause the melted butter to seize into small clumps.
3. Combine with Care
Make a well in the center of the dry ingredients and pour in the wet mixture. Use a rubber spatula to fold the two together until just combined. A few small lumps are perfectly fine; over-mixing will develop the gluten and result in a tough, bread-like waffle instead of a light, tender one. Fold in the chocolate chips at the very end.
4. Preheat and Pour
Heat your waffle iron to its medium-high setting. Lightly coat with non-stick spray or melted butter. Pour the batter onto the hot iron (usually about ½ to ¾ cup depending on your machine size).
5. The Golden Steam
Cook according to your manufacturer’s instructions, typically for 3 to 5 minutes. A great indicator of readiness is the steam: when the steam stops billowing out of the sides of the iron, the waffle is usually crisp and set.
6. The “Crisping” Secret
For the absolute best texture, place the finished waffles directly on a wire rack rather than a flat plate. This prevents steam from being trapped underneath, which would make the bottom soggy.
Flavor and Texture Notes
The first sensation is the shattering crunch of the exterior, which carries the deep, earthy bitterness of the cocoa. This is immediately followed by the interior—a texture that is velvety and rich, punctuated by “molten” pockets of melted chocolate chips.
Because we use brown sugar and vanilla, the flavor has a caramel-like undertone that mimics the complexity of a high-end brownie. It is a harmonious experience where the richness of the chocolate is celebrated by the light, airy structure of the waffle itself.
Tips and Variations
- The Espresso Boost: Add 1 teaspoon of espresso powder to the dry ingredients. It won’t make the waffles taste like coffee, but it will intensify the chocolate flavor significantly.
- Fruit Contrast: Top with fresh raspberries or sliced strawberries. The acidity of the fruit is the perfect foil for the heavy chocolate.
- The “Black Forest”: Serve with a dollop of whipped cream and a spoonful of cherry compote.
- Buttermilk Substitute: If you don’t have buttermilk, add 1 tablespoon of lemon juice or white vinegar to 1 ½ cups of regular milk and let it sit for 5 minutes.
Storage and Make-Ahead
- Refrigeration: Store leftover waffles in an airtight container for up to 3 days.
- Freezing: These freeze exceptionally well! Freeze them in a single layer on a tray, then transfer to a freezer bag. They stay delicious for up to 2 months.
- The Toaster Method: To reheat, skip the microwave. Place the frozen or refrigerated waffles in a standard toaster. It brings back the original crispiness perfectly.
FAQ
Can I make these gluten-free?
Yes, you can substitute the all-purpose flour for a 1-to-1 gluten-free baking blend. Because cocoa powder is naturally gluten-free, the texture remains quite similar.
Why are my waffles sticking to the iron?
This usually happens if the iron isn’t hot enough or if there isn’t enough fat in the batter. Ensure your iron is fully preheated and that you’ve used the full amount of butter.
What if I don’t have a waffle iron?
You can use this exact batter to make Chocolate Pancakes! Just cook them on a griddle over medium heat for 2–3 minutes per side.
Conclusion
Indulgent Chocolate Waffles are a reminder that the most satisfying breakfasts often come from the simplest ingredients treated with a bit of decadence. They are a “pantry-staple” miracle—transforming flour, cocoa, and buttermilk into a sophisticated, soul-warming treat. Whether you’re looking for a stunning weekend centerpiece or a reliable classic to master for a special occasion, these waffles are a reliable, delicious classic.