Follow Me On Social Media!
No-Bake Peanut Butter Pie
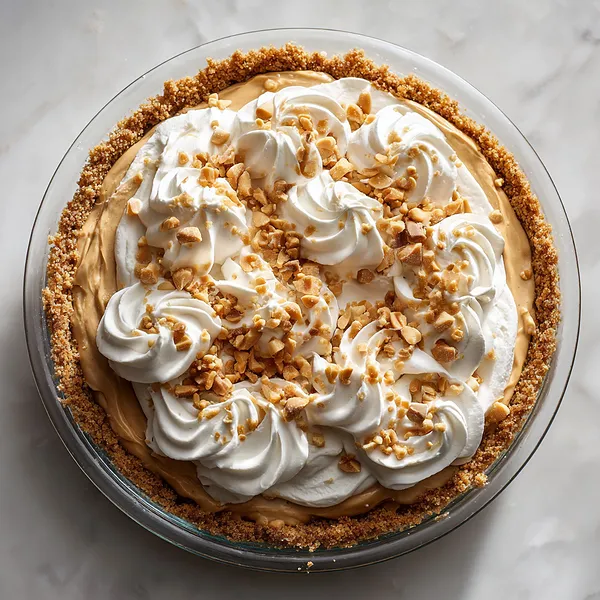
This no-bake peanut butter pie combines a buttery graham cracker crust with a smooth, airy peanut butter filling and a cloud of freshly whipped cream. The result is a rich yet light dessert that sets beautifully in the refrigerator without the need for baking.
Why You’ll Love This Recipe
- No oven required – Perfect for warm days or quick preparation without heating the kitchen.
- Ultra-creamy texture – Whipped cream folded into the filling creates a mousse-like consistency.
- Simple pantry ingredients – Uses common baking staples that are easy to find.
- Make-ahead friendly – Chills and sets in advance, making entertaining stress-free.
- Balanced sweetness – Cream cheese adds subtle tanginess to prevent the pie from being overly sweet.
- Customizable toppings – Easily adapted with chocolate, caramel, or different nut garnishes.
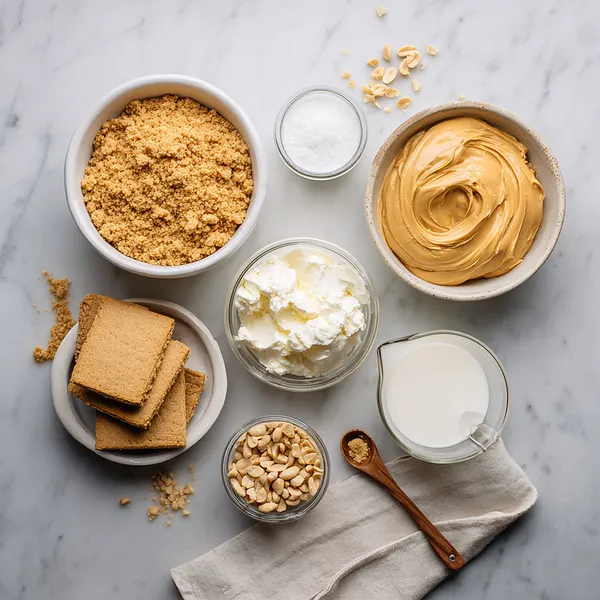
Ingredients You’ll Need
Graham Cracker Crust
- 1½ cups graham cracker crumbs – Forms the structured base and adds mild honeyed flavor.
- ⅓ cup granulated sugar – Sweetens and helps bind the crust.
- 6 tablespoons unsalted butter, melted – Provides richness and holds the crust together when chilled.
Peanut Butter Filling
- 8 oz cream cheese, softened – Creates a smooth, tangy foundation and stabilizes the filling.
- 1 cup creamy peanut butter – Delivers nutty flavor and creamy body.
- 1 cup powdered sugar – Sweetens while dissolving easily for a silky texture.
- 1 teaspoon vanilla extract – Enhances overall flavor depth.
- 1½ cups heavy whipping cream, divided – Whipped for lightness and structure in both filling and topping.
Topping
- ½ cup chopped peanuts – Adds crunch and visual contrast to the finished pie.
Step-by-Step Instructions
Prepare the crust – Mix graham cracker crumbs, sugar, and melted butter until evenly moistened. Press firmly into a 9-inch pie pan and refrigerate for at least 30 minutes to firm up.
Beat the cream cheese and peanut butter – Using an electric mixer, blend softened cream cheese until fluffy, then incorporate peanut butter until smooth and cohesive.
Add sugar and vanilla – Gradually beat in powdered sugar and vanilla extract, scraping the bowl to ensure a lump-free mixture.
Whip the cream – In a chilled bowl, whip 1 cup heavy cream to stiff peaks, about 3–4 minutes, to create structure for the filling.
Fold to lighten the filling – Gently fold half of the whipped cream into the peanut butter mixture using slow, upward motions to maintain volume.
Fill and chill – Spread the filling evenly into the prepared crust, smooth the surface, cover, and refrigerate for 3–4 hours or overnight until fully set.
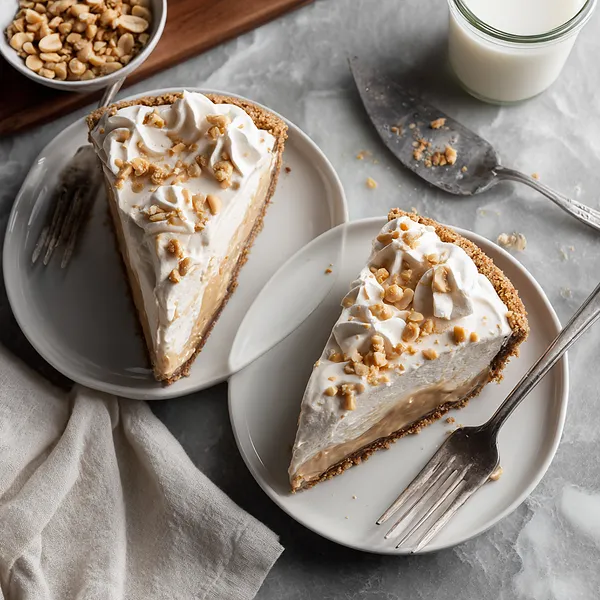
Finish with topping – Whip the remaining cream to stiff peaks, spread or pipe over the pie, sprinkle with chopped peanuts, slice cleanly, and serve chilled.
Recipe Notes & Tips
- Room-temperature cream cheese – Prevents lumps and ensures a velvety filling.
- Use conventional creamy peanut butter – Natural varieties may separate and affect texture.
- Chill the mixing bowl for whipping cream – Helps achieve stable, stiff peaks more quickly.
- Fold gently, not stir – Preserves airiness for a mousse-like consistency.
- Overnight chilling improves structure – Produces cleaner slices and deeper flavor.
- Warm knife for slicing – Dip in hot water and wipe dry for neat presentation.
Nutritional Information
- Prep Time: 20 minutes
- Chilling Time: 3–4 hours
- Total Time: Approximately 4 hours 20 minutes
- Servings: 8 slices of pie
- Calories: ~450 per serving (estimated; varies by ingredients and portion size)
Perfect Pairings
- Fresh berries – Provide tart contrast to the rich peanut butter filling.
- Hot coffee or espresso – Balances sweetness with bitterness.
- Chocolate drizzle – Adds complementary depth and visual appeal.
- Vanilla ice cream – Creates an indulgent, creamy dessert plate.
Ideal Occasions
- Summer gatherings – No baking keeps preparation cool and simple.
- Holiday dessert tables – Crowd-pleasing flavor loved by all ages.
- Potlucks and picnics – Easy to transport once chilled and set.
- Family celebrations – Elegant presentation with minimal effort.
Storage & Serving Tips
- Refrigerate covered – Keeps the pie fresh for up to 4 days.
- Avoid freezing fully assembled pie – Texture of whipped cream may change.
- Serve well chilled – Ensures clean slices and best mouthfeel.
- Store slices in airtight container – Prevents crust from absorbing moisture.
Creative Variations to Try
- Chocolate peanut butter version – Add cocoa powder to the crust or drizzle melted chocolate on top.
- Crunchy peanut butter swap – Introduces extra texture in the filling.
- Caramel swirl – Fold caramel sauce lightly into the filling before chilling.
- Gluten-free crust – Use gluten-free graham crackers or cookie crumbs.
Troubleshooting Common Issues
- Filling too soft – Chill longer or ensure whipped cream reached stiff peaks.
- Lumpy texture – Cream cheese was too cold; beat longer until smooth.
- Crust crumbling – Press more firmly or add a small amount of extra melted butter.
- Whipped cream deflating – Avoid over-folding and keep ingredients cold.
Why This Recipe Works
This recipe succeeds because it balances fat, air, and structure. Cream cheese stabilizes the peanut butter while whipped cream introduces tiny air pockets that create a light mousse texture. Chilling allows butter in the crust to solidify and the filling to firm without gelatin or baking, producing clean slices and rich mouthfeel. At roughly 450 calories per serving, it remains an indulgent yet portion-controlled dessert.
Final Thoughts
No-bake peanut butter pie is a dependable, crowd-pleasing dessert that delivers rich flavor with minimal effort. Its make-ahead convenience, customizable toppings, and creamy texture make it suitable for both casual gatherings and special occasions. For a lighter option, consider reduced-fat cream cheese, smaller slices, or fruit-based garnishes while still enjoying the classic peanut butter experience.